Showing posts with label Technique. Show all posts

2.22.2018

Triple Take Thursday 1: Plates, Film, and Digital

Variety is the slice of life.  While I continue to shoot traditional film stocks lately, I've been dabbling in some other mediums at the same time.  I've become increasingly involved in the use of dry plates coated by Jason Lane, that have allowed me to use a number of cameras designed for such plates, while also improvising their use into a many other roll film cameras as well. 

I'm also doing a little bit more with digital cameras, between early models with decent specifications and more recent ones with more bells and whistles.  While it's no replacement for a film camera, it does make a pretty easy tag along on my film (and now plate) photo outings.  

Here and there, as I shoot some plates, I'll be supplementing them with the same scene shot on both film and digital to allow for an interesting comparison between the blue sensitive media of the plates, the panchromatic or color media of the film, and one or more settings on a digital camera that may mimic or differ from that of the non-digital media.  

First up in a scene taken in Patterson Park in Baltimore.  I'd known for some time that there was a small lake there, but had never taken the time to visit it until earlier this week.  Along with me for my visit were a Kodak Recomar 33 plate camera that shoots 9x12cm size plates, a Kodak Signet 35 kindly lent to me by Mike Eckman, and a Nikon J1 that I recently picked up.  As a gentle drizzle began to threaten, I managed to shoot a closely focused scene along the banks of this small pond on all three cameras to compare.  


Kodak Recomar 33: 9x12 J. Lane Dry Plate developed in HC-110 and printed on Ilford Multigrade IV RC paper.  Shot at f/8 for 4 seconds

12.18.2017

Innovation Station: Medium Format Macros for the Frugal

Shooters of the 35mm format seem to get all the perks cheaply.  For under $20, one can easily pickup any of a wide number of choices for a competent used shooter taking 135 stock that will pretty much do about all that one can expect, including a wide range of shutter speeds and the ability to close focus on even some of the most basic of cameras, allowing for some great shots with wonderful separation of field.

In the world of medium format however, this wide array of choices quickly vanishes.  For those of us who love working with the larger negative sizes that 120 film offers, securing a decent 120 camera for anywhere under $100 often seems like something of a challenge.  And whether one's 120 camera of choice is ultimately is a TLR, a guess focus folder, or a something more along the lines of the "Texas Leica," the ability to get close can be especially elusive on medium format altogether. 

However, with a little bit of ingenuity and some stubborn determination, one can pretty readily be up and about shooting macros in medium format after having spent less than $20 in equipment for camera and accessories, while having a tremendous amount of fun and involvement in the process! This is the hobby of photography at its most enjoyable and affordable. 

So let's start with a shot taken on Ilford HP5 with focus around infinity.  Pretty decent stuff, though this gate in foreground is completely out of focus.  It'd be great to pull the focus a bit closer...

Hey, now we're getting somewhere, though the ornament is still a bit shy of the sweet spot...

Now that's better!  Any chance focus can be pulled in even further?...

Now this is closer than one typically sees from medium format cameras.  Just how close can we pull in focus?

All the way to the nearest bar in the gate!  By now that once crisp backdrop has been wonderfully muted in the distance.

The camera used to produce these images cost me just $15 in a second hand shop, and is readily found in antique stores or online auction sites at around the same price in ready to use condition.  So what did I use for these medium format macro photos?  This! 

A simple Kodak Brownie Number 2 was used to create all of the images above, by means of a pretty simple technique.

11.28.2017

Darkroom Diaries: Ilford Pan F+ 50 and Photographers Formulary TFX 2

Challenging one's comfort zone admittedly is a good thing.  As big of a fan of HC-110 as I am, I did have to wonder what else was out there in black and white developers that might work well to give me.  As my supply of the syrup was winding down, I began to explore what other options might be out there, and was wondering what I might find to vary my stable of developers.

Ultimately I selected Photographer's Formulary TFX-2.

The desire to try a new developer actually goes a bit beyond simple caprice as I imply.  As much as I love HC-110 as a general purpose developer, I wanted to see what I might be able to find that might be a lower contrast developer, particularly for use on microfilm as well as Ferrania P30, both of which tended to have higher contrast in HC-110.  I'd seen some results of P30 in the Metol based Beutler formula, which really looked promising, and was about to pull the trigger on the needed powders when, on perusing the wide array of options from Photographer's Formulary, elected that TFX-2 was the perfect choice.  Similar in makeup to the Beutler formula, but in a 2 part liquid formula that could be used as a one-shot developer, TFX-2 also had some at least one follower who was using it as a stand developing solution!  It was just like taking my existing practices and just changing the ingredients! 

Rather than jump directly into microfilm developing with TFX-2, I elected to do my first tries of stand developing of this developer using a couple of rolls of Ilford's Pan F+ film, a 50 speed emulsion known for being a bit heavy on contrast.  Using 12.5ml of both solution A and B in the 400ml tank for a 30 minute stand, I was quite curious to see what I'd get.  My first roll was a roll of 120 shot in a newly acquired Zeiss Ikonta 515/2, and my second roll was a cut down roll of 127 taken in my newly beloved Zeh Goldi.  

My results show a mix of promise and concern.  Some are simply wonderful, while I find there are a few challenges that can result when using this developer, at least on the somewhat temperamental Pan F film...


From the Zeiss folder, I'm instantly impressed by the first frame developed in TFX-2.  Though the sky shows some rather odd developer artifacts around the steeple, the tonality in the statue is nothing short of wonderful to me.

10.06.2017

Darkroom Diaries: Mastering Microfilm with HC-110

Looking to shoot film on a budget?  How about this "All You Can Eat Buffet" deal of the film world! For the cost of about 2 rolls of film, you are supplied with enough film to make about 20 or more rolls of film! This film has a nice slow speed and fine grain to allow you to open the lens up on most cameras in full sun, and it comes free of perforations, making an ideal candidate to stock 828 cameras with film! 

So what's the downside?  Well, there's lots of contrast that needs to be tamed in order to get an image with a more pictorial feel.  And the lack of sprockets that makes this a great 828 film also makes it very difficult to use in 35mm cameras, with some models needing some degree of modification, with some other cameras entirely unable to use the stock.  

This bargain film stock is microfilm, a long established medium of Archivists for the preservation of print media. Though never manufactured for pictorial use, this fine grained stock can be adapted for use in 828 and many 35mm cameras with a few caveats.

The most inhibiting of these caveats is the lack of perforations (sprockets) in most microfilm stocks.  This is film that was designed to be fed through a viewer with direct wheel contact, rather than fed through a camera with sprocket gearing and teeth.  This works fine in an 828 camera, but will slip when fed through manual advance 35mm cameras.  Many of the more modern 35mm film cameras with auto advance use an IR sensor that counts the film sprockets in 35mm stock as it advances.  With non-perforated microfilm, these cameras have no sprockets to count, and will simply give up and return the film to the 35mm cassette after attempting to load it.

For manual advance cameras that use a toothed wheel to pull film onto the take up spool, an improvised solution is to apply a layer or two of painters tape to the this wheel to increase adhesion and avoid the slippage that would otherwise result.  Within two minutes of trying this with a Ricoh KR30SP that I have, I had a camera that readily accepted the Microfilm stock.

Two 35mm cameras that will accept microfilm without any modification are the Canon 10S and the original Voigtlander Vito.  Both of these use a contact wheel that lacks teeth to advance film onto the take up spool.

So this all established, what are the rest of the challenges to using this medium?  The first would be supply.  Microfilm isn't typically found in the same places that those of us shooting conventional film pick up our supply.  Neither B&H nor Freestyle sells it, but it can typically be found on eBay.  If lucky, one can find single (100 foot long) roll sales for under $20.  It may take some patience and scouring, but it is out there.

Somewhat less challenging is the process of preparing a length of microfilm for use in a camera.  With 35mm, this involves taking a reusable cartridge, and either loading it with a length of film in the dark, or using a daylight bulk film loader.  Either method should work, but I used the former method, limiting the length of film to about an 18 shot roll.

I also loaded some 828 rolls by simply doing the same process above, but instead interleaving it with 828 backing paper (that the film was taped to on its beginning side) as I wound it onto an 828 spool. It wasn't long before I had three rolls of film ready to use in a variety of cameras.

Shooting this film involves some additional challenges.  I found that rating the Kodak Imagelink 1461 film at about ISO 20 seemed to give the best results.  

I knew I would encounter the potential for a lot of contrast when developing, and elected to scale back my typical stand development time (using Kodak's HC-110 developer at a 1:99 dilution) from 30 minutes to only 16 minutes.  This resulted in some pretty thin negatives, but these scanned with no issues whatsoever.

Below are some samples from my first three rolls of microfilm - the "All You can Eat Buffet" of the photographic world. 

On a very sunny day, I ran a short roll of Microfilm through a Bantam f/8 828 camera.  This wound up working perfectly with the slow shutter of the camera, and delivered some particularly good images given the very limited capabilities of this basic camera. Contrast is a bit high still, but not in an overwhelming way.

7.19.2017

Fun with Film: Ferrania P30 (Part 1- The Agfa Cadet A-8)

Roughly three years ago, I elected to jump aboard a Kickstarter "crowdfunding" effort for the first time, namely one to rescue invaluable film production equipment to enable the resumption of photographic film production in Italy, with an expected reward to me of snapping up a few rolls of E6 transparency film for my financial support.

Yesterday, I had my first chance to sample some of the wares of the down-scaled film production plant in Italy.

Though not the 120 format color transparency film I'd initially expected to be using as a "thank you gift" for my support, I was thrilled nonetheless to have the opportunity to shoot Ferrania's first public product since their small core of workers reinitiated their coating lines roughly six months ago.  This was my chance to shoot Ferrania P30.

P30 is based upon a classic cinema film formula used by legends such as Federico Fellini.  It purports to be "silver-rich" emulsion that can yield a classic cinematic look rich in tonality and contrast to deliver stunning images with strong black tones often absent from many contemporary emulsions. As a Kickstarter backer, I was able to pick up 5 rolls of the film at a modest discount on a pre-sale promotion.

Order fulfillment was nothing of the likes of Amazon's "Next Day Shipping" but this was to be expected, given the small staff of Ferrania still had a number of production and distribution challenges to iron out as they worked through the allotment of orders in this "Alpha" batch, which sold out in a matter of a couple of weeks.  And while waiting for this much anticipated film sometimes seemed to take an eternity, I was quite pleased to see the arrival of the box with my 5 rolls of Ferrania P30 enclosed.

I was also a bit panicked. With 5 rolls of scarce film and numerous cameras to select from in which to shoot this film, I was a bit overburdened with the task of choosing which cameras would be best to conduct my own bit of "testing" on this classic emulsion.

However, being ever a bit quirky with my ways, I couldn't resist the urge to do something a bit "unique" with some of my P30.  I was also interested in seeing some results from this film without having to blow through an entire 36-exposure roll before seeing the first shot.  I elected to "split" the first roll between two cameras, and took the rather unconventional option of spooling it onto 127 backing, for use in my Agfa Cadet A-8 camera.  

Yes, while others were using their limited allotment of this film in their finest machinery worth hundreds if not thousands of dollars, I was snapping off my first sample shots of this coveted film in a $10 box camera.  

Truth be told, it wasn't a bad idea.  Not only would I get a chance to run through the exposure and development process, while acquiring a few "lessons learned" prior to the full completion of the first roll, I'd have a chance to use one of my favorite cameras for "sprocket scans" and get some novel 35mm x 65mm exposures. Besides, the use of a 127 camera for Ferrania film had plenty of precedent, with Ferrania having produced both cameras and film in this format in their heyday. 

After going through the respooling process, firing off 8 shots on the film stock was a piece of cake. Though the mid-Atlantic was in the midst of a mid-Summer heat wave, my lunch hour in the Nation's Capital was one of sunny conditions.  I elected to shoot 6 of the first shots at lunch and save two for a detour on the way home, as intermittently cloudy skies and afternoon thunderstorms moved through the region.  My hope was to get some variance in the lighting conditions for this initial roll, given that this basic camera lacks even a diaphragm setting to stop the lens down to adjust exposure.

Developing the P30, I elected to start this first roll by trying HC-110 in a freshly mixed 1:63 dilution for 12 minutes with 15 seconds of gentle agitation every 2 minutes.  This process is somewhat contrary to Ferrania's recommendations for developing this film, in which they recommend a less dilute formula with near continuous agitation that is more consistent with cinema type development processes.  I noted that the acetate film stock was a bit thick and stiff and as a result, slightly challenging to get going on my steel development rolls.  Unlike many other films that leave a color cast in the developing solution after development, the developer poured out with a neutral cast.

The negatives that emerged after the final bath of Photo-flo seemed to be well exposed and had adequate contrast, a relief given the lack of exposure control available to me as I took the inaugural images.  The film dried to a fairly flat result that whose somewhat thick stock was easily loaded into my full width scanning tool.

The scans from this first batch however, are missing the desired snap that I've observed in some of the other results posted online, but still offered a good starting point to learn more about this film and its character, as well as to strategize some changes possible as I shoot and develop more of this film. Having these images as my first set have certainly given me a chance to think of how to better hone future shots on this film to get a more desired outcome.  

My first shot on Ferrania P30.  Looking past the sharpness missing from nearly every part of the frame, I'm a bit more disappointed to see a lack of deep black tones in the shrubbery. 

9.13.2016

Fun with Film: Portra 160 Slowed Down

Sometimes a limit of choices is a good thing. 

I've never been terribly good with making quick purchasing decisions when confronted with something unpredictable, particularly that I hate going out to spend money for something only to not find it and having to settle for an alternative. 

Such was the case a few weeks ago, when, as I made my way up to the counter of my favorite Brick and Mortar photo store to buy a couple of rolls of Ektar 100 in 120, one of which I'd hoped to cut down to 127 to shoot through my Bell and Howell Electric Eye camera.  Turns out, they were out of Ektar.  

"I've got Portra 160" stated the shop owner.  Hmm, I figured this trip was a total bust since I try to shoot brighly colored landscapes instead of portraits with restrained saturation, but since time was ticking for me to do my photo run, and since I always like to support my local stores, I elected to pick up a couple of rolls to give it a try anyway.

However, the Bell and Howell is not geared for the speed of 160 and tips the scales at about ISO 80. I knew this going in, but hoped that the one stop speed increase wouldn't present too much of an issue. Upon reading a bit of reviews of Portra, I surprised to see that more than a few people said they had their best results with color saturation with the stuff at speeds between 50 and 100. As it turned out, my gamble might actually pay off.

I cut down the roll of 127 film, loaded up the Bell and Howell and went out shooting during lunch on a photo perfect day of lightly cloudy blue skies.  I didn't spend a great deal of time composing, but rather sought out colorful scenes to put this "saturated Portra" idea to the test.  Upon developing and scanning, I was delighted to see that Portra is indeed a great and colorful film when given a stop of extra exposure.

Under blue skies but shadows, Portra delivered a nice palette of colors, but its real saturated strengths emerged...

9.06.2016

$20, 21 Rolls. A Color Celebration!

The term "do-it-yourselfer" is pretty much a common part of conversational parlance these days, fueled to a large degree by the abundance of home improvement stores complemented by television networks devoted to featuring all of some of their programming to the "DIY" concepts.  Since moving a year ago, my weekend life has involved a oft-frustratingly expanding "Honeydo" list that only seems to grow as each project is finally completed. 

Given this, the thought of processing my own film had never quite appealed to me.  That was until I began to look at what professional developing was costing me.  Despite being a quirky guy with a camera, I'm also a frugal guy with a family, and thus, I began to develop my own black and white film, which proved to be a particularly simple enough exercise once I adapted my methods to something that works pretty readily around my sometimes involved home life. I'd figured that self-processing of black and white film would be as far as I'd venture, and that was fine, given that I'd expected color to be far less forgiving to my methods.

And then, as luck would have it, this all changed.

While perusing the Film Photography Project store, I stumbled upon an offer so good, I simply couldn't resist considering it.  For the measly sum of $19.99, I could get a Unicolor type color processing kit, in addition to 2 rolls of Vision 50T film.  I had just been considering picking up a couple of rolls of the film as it was, but it seemed the Rem Jet backing made it a tough film for which to find processing.  Not only would this address the need to find processing for such film, but it also tossed in the film I would have bought anyway as a bonus!

After a modest amount of online investigation into home processing with such a kit, in which pretty much every review stated that color processing with this kit was actually far easier than initially expected, and also reading that the stated yield of "8 rolls" from this kit had a great deal of elasticity if rolls were processed within two weeks of mixing, I figured that this small investment was certainly worth a try.  And I also figured that if I planned out my batches smartly. I could do as others had testified, and process at least 16 rolls of film from this 8 roll kit.

Without going into great detail of the process (there are already many resources that very capably detail the procedure far better than I could), I can unquestionably say that this was one of the best investments I've ever made.  Processing the first batch was both exciting and terrifying, but once I saw results from this, I managed to calm down to make slight revisions on future batches to make the process a bit more controlled and predictable.  

The ability to process so much color film so cheaply will enable me to really pick up the pace on postings, and has already enabled me to do things that I'd have been hesitant to do otherwise.  I've managed to test several "new" cameras, do a wider variety of things with many of my existing favorite cameras, try different film brands in a variety of ways, and of course do a quirky thing or two that I'd have likely passed up otherwise if it wasn't so affordable and accessible to process color film.  You'll begin to see some of the results of this vast experiment in the coming week.  

And in the meantime, it is only fitting that I provide some sample images from each roll so that you can see just a small fraction of what is to come!  For now, I'm keeping the film and camera of each a thinly veiled secret until I post the accompanying posts of content. 


Roll 1 


8.26.2016

Lots to Come

I realize that posts have gotten to be erratic, but I can assure you that my enthusiasm hasn't waned, or that I'm not working on material.

In fact, I'm in the process of one of my most ambitious projects: namely that to develop color negative film myself, and it requires a lot of shooting, batching of rolls and processes to make as cost effective as I want.

The good news is that my initial attempts at it have met with success, and once I finish up this mega batch of film, I'll be able to give quite a bit more dimension to camera reviews, film reviews, and I've got a nice bit of truly quirky stuff up my sleeve that this project will help me in as well.  

For now, a sample result of self-processed film, taken on the Argus Argoflex Forty on Ektar 100.  


Stay Tuned! 

7.28.2016

Square Shooter - Part II - Shooting 24mm shots on the Bantam RF

I have a tendency to like to interject idioms or expressions into my postings, and in this case, I feel the need to do a common intro theme to what is a natural pair of postings with the following theme: An Opportunity Lost is An Opportunity Gained.

Most hobby photographers (and many pros) are often well aware of the phenomenon known as GAS, or "Gear Acquisition Syndrome."  It's a tendency to want to constantly add to your inventory of photographic items, either with new cameras, new lenses, or even new accessories.  Even on a greatly reduced budget such as mine, there are cheap opportunities to add to one's collection.

When I first saw results on Lance Rothstein's "labeauratoire"site from the square format 35mm shooter known as the Minolta 24 Rapid, I had a lot of interest in picking one up when the opportunity might present itself.  However, due to some reluctance after a few too many bad rangefinder acquisitions, I dragged my feet when a cheap example popped up for sale, and someone else beat me to it.

Perusing the interwebs for other possibilities, I came across a striking suggestion to MAKE a square format camera from an 828 body.  As a huge fan of 828, the idea certainly struck a chord with me, and with some help from my buddy Mark at the Gas House, I managed to install a pair of varied mods to make this interesting idea a reality.  Each of these concepts has some uniqueness, and both have some advantages over the other. 

Have a look at this "creation" of a square shooter.


While it seems as though I've been shooting 828 cameras forever, the reality is that I've only been creating decent images from them for about 6 months.  Still, I've shot a decent amount in this 28x40mm format.  And while the film is no longer commercially produced, I'd yet to use the most common method to improvise 828 film, namely to tape 35mm film to an 828 backing, instead electing to mostly use cut down 120 stock, supplemented at times by expired "true" 828 stock.


7.27.2016

Square Shooter - Part I - The Bantam Flash "282" Folding Camera

I have a tendency to like to interject idioms or expressions into my postings, and in this case, I feel the need to do a common intro theme to what is a natural pair of postings with the following theme: An Opportunity Lost is An Opportunity Gained.

Most hobby photographers (and many pros) are often well aware of the phenomenon known as GAS, or "Gear Acquisition Syndrome."  It's a tendency to want to constantly add to your inventory of photographic items, either with new cameras, new lenses, or even new accessories.  Even on a greatly reduced budget such as mine, there are cheap opportunities to add to one's collection.

When I first saw results on Lance Rothstein's "labeauratoire"site from the square format 35mm shooter known as the Minolta 24 Rapid, I had a lot of interest in picking one up when the opportunity might present itself.  However, due to some reluctance after a few too many bad rangefinder acquisitions, I dragged my feet when a cheap example popped up for sale, and someone else beat me to it.

Perusing the interwebs for other possibilities, I came across a striking suggestion to MAKE a square format camera from an 828 body.  As a huge fan of 828, the idea certainly struck a chord with me, and with some help from my buddy Mark at the Gas House, I managed to install a pair of varied mods to make this interesting idea a reality.  Each of these concepts has some uniqueness, and both have some advantages over the other.  

Have a look at this "creation" of a square shooter.


The 282 camera never really existed, but after "creating" one with only a minimal amount of effort, I'm at something at a loss in wondering why it didn't.


5.16.2016

Film Fun Folio #26: Franka Solida (2.0) and Rollei RPX 25

Periodically, I'll be posting scans of some complete rolls of film on here, showing both the good and the bad, and giving some basic information as well a little write up of the shoot as well as the reasons why I selected each camera and film.  Enjoy the trip! 

Feature #26:
Camera: ca. 1952 Franka Solida II with Schneider Radionar 75mm f/2.9 lens.
Film: Rollei RPX 25
Locale: Central Maryland and nearby.

Though the camera is called a Franka Solida II, I'm calling this camera a Franka Solida 2.0, as it is a replacement for my original unbadged Franka that I got in late 2014.  The original gave great results, but had a extremely fidgety shutter whose stickiness resulted in far too many lost shots.  I had a replacement on my radar for months, and finally found one with the same Schneider Radionar lens in January.  The shutter works great, though the lens shows some signs of internal fungus.  I elected to give it an initial try before seeking to remedy the issue on this camera (or trying to switch lenses) and here are the results. 


1 - Frederick, MD - f/2.9, 1/25 - Looking like some sort of photo taken on an Arctic expedition a century ago, I can't speak of what didn't quite go as expected with this image. 

4.08.2016

Film Fun Folio #24: Balda Lisette and Efke 50R

Periodically, I'll be posting scans of some complete rolls of film on here, showing both the good and the bad, and giving some basic information as well a little write up of the shoot as well as the reasons why I selected each camera and film.  Enjoy the trip! 

Feature #22:
Camera: ca. 1938 Balda Lisette 645 with Meyer Trioplan 75mm f/2.9 lens.
Film: Efke 50R (Recently Expired)
Locale: Central Maryland and Washington DC.

Winter doldrums are never fun, and for me, they have tended to send any camera I own into a state of hibernation.  This year, however, with a new setting around me, I vowed to keep the shutters clicking as the days grew shorter, the temps got colder, and the palette grew increasingly more bland. 

Fortunately, I'd seen a lot of good black and white work online that became an inspiration for me to try to get the most from a medium that I too often downplayed.  It had been a while since I'd played with the creamy tones of Efke's 50R film so I loaded a roll in my pretty reliable little Lisette and shot through it over a period of weeks.  A few frames into the roll, I decided that I would do something offbeat and try and shoot the entire remainder of the roll wide open at f/2.9, trying to take full advantage of the Trioplan's fast lens and interesting bokeh. Doing this on a "guess focus" camera was quite risky, but I hoped for the best as I made my way through the roll. 


In addition, I decided to "tone" the results in an online photo editor, since I felt the originals were just a bit too bland.  I tried not to overdo it, and I think in that regard I did well, though the results are likely to be subjective.  


Washington, DC - One of my favorite classic signs in the Nation's Capitol for photos only comes out so-so in this image that is contrasty and uninspiring.

3.25.2016

Film Fun Folio #23 - Balda HaPo 10 and (LONG!) Expired Verichrome Pan

Periodically, I'll be posting scans of some complete rolls of film on here, showing both the good and the bad, and giving some basic information as well a little write up of the shoot as well as the reasons why I selected each camera and film.  Enjoy the trip! 

Feature #23:
Camera: ca. 1938 Balda Hapo 10 with 105mm Steinheil Munchen f/3.8 lens.
Film: Kodak Verichrome Pan (Expired 1962)
Locale: Central Maryland and Washington DC.

It's always the ones you have the highest hopes for that let you down.  When I pulled the trigger on the Hapo 10, enamored with its looks, I hoped this would be a great addition to my 6x9 cameras.  I ultimately was underwhelmed after three rolls of film through this camera failed to really give much in the way of good results.

However, after experiments using old Verichrome Pan gave me surprisingly good, if somewhat vintage looking results, I thought it might be time to give the old Hapo one more try.  It's slow performing shutter seemed a good fit for a long expired film that needed over exposure.  I hoped I could get at least a suitable result or two from this old camera that had been sitting for nearly a year, or at least I could play on the seeming flaws of the Hapo and create a roll of very distressed shots done just for fun.  

The first two shots were immediately blown, to no fault of the Hapo.  When I loaded up the film, I should have done an initial re-taping of this 50 year old film to its backing paper in the dark prior to loading. Sure enough the tightly curled film separated from the backing and as a result, I lost the first exposures.  I could only hope the remaining six chances were enough to get something good from this pretty, but pretty disappointing camera.  Note: Keep in mind the "settings" here are what was on the camera, but this camera is known to have a slow shutter, so they are likely to be about half as fast as what is indicated for these images.  

A---------------------------------------B--------------------------------------------C---------------D
3 - Monrovia, MD - f/4.5, 1/100 -  Interestingly, what would pretty much turn out to be the most disappointing shot on the roll would also serve as the most informative,  I should have really backed further up to get this ramshackle old house along the road, for a better result, but looking at the image, something is apparent: the area between B and C above is fairly sharp, while the areas outside of this tend to be blurred.  I had never noticed this tendency before on previous rolls, and by sheer coincidence, the rest of the roll would tend to have its subjects in this area of the frame.  


3.11.2016

Film Fun Folio #22 - Zeiss Ikonta 521 and Cross Processed Agfa CR 200

Periodically, I'll be posting scans of some complete rolls of film on here, showing both the good and the bad, and giving some basic information as well a little write up of the shoot as well as the reasons why I selected each camera and film.  Enjoy the trip! 

Feature #22:
Camera: ca. 1946 Zeiss Ikonta 521 with Novar f/3.5 lens.
Film: Agfa CR 200 (Cross Processed in C41)
Locale: Central Maryland.

Amid a very busy shooting session in the Fall of 2015 in Frederick County, Maryland, I ran through my rolls a bit more rapidly than originally anticipated.  I'd brought along a few spare rolls as insurance, and I hastily elected to use this roll of CR200 to get a few more exposures.  In hindsight, I'd have more likely elected to use one of the many rolls of Velvia 100F I had on hand rather than my only roll of CR200, but this allowed a good chance to get another look at this unique film.  The frugal part of me would have felt better eeking out 12 or 16 exposures from this roll rather than the 8 possible using a 6x9 camera, but this allowed me a fun chance to see the capabilities of this film in a range of daylight situations.


When it came time to process the film, I elected to cross-process it, mainly because I had read good things about cross processing this film compared to more disparaging things about developing it in E-6.  I guess it was time for me to see what the fuss was about.  


1 - Braddock Heights, MD - f/11, 1/250 - The first shot is sharp enough, but man is it golden in hue.  I don't hate it, but it didn't quite have the fun vibe from the offset that my first cross processed roll had going for it.

2.26.2016

Film Fun Folio #21 - Agfa Billy Record and Rollei Retro 80S

Periodically, I'll be posting scans of some complete rolls of film on here, showing both the good and the bad, and giving some basic information as well a little write up of the shoot as well as the reasons why I selected each camera and film.  Enjoy the trip! 

Feature #21:
Camera: ca. 1951 Agfa Billy Record I with Agnar 75mm/f 6.3 lens.
Film: Agfa Rollei Retro 80S 
Locale: Frederick County, Maryland.

Since the day I first used it, the basic Agfa Billy has been all but asking to be taken seriously in spite of its very limited shutter speeds, and its slow and basic lens.  It's a well working and easy camera to use, but in retrospect, it has often been overlooked as a serious image maker for other cameras in my repertoire.  As a result, it has seen decent usage, but its most recent "assignments" have been more for novelty photography, such as with long expired film or as a test bed for cross processing of slide film.  

In these experiments, I had been pleasantly surprised by the quality of the images put forth by the less than revered Agnar lens.  Thus, I elected to approach this roll of my much liked Retro 80S film with a more serious tone.  All shots were exposed at an EI of about 50 and all are taken within an aperture stop of one stop from wide open.  And this marks one of the few times when I actually load one of these old cameras with film that has a common brand with it, as Rollei film carries the same Agfa diamonds as this camera.  

Though sent off with 7 rolls of color 120 slide film of colorful fall scenes for developing, I was extremely eager to see the results from this roll taken on black and white.  My findings are below.


1 - Catoctin Furnace, MD - f/8, 1/50 - I struggled for a good perspective from which to shoot this old iron furnace.  Foliage just didn't seem to fall in the most photogenic places.  The result above is OK, but doesn't quite hit the mark. 


2.12.2016

Film Fun Folio #20 - Yashica 12 and Velvia 100F

Periodically, I'll be posting scans of some complete rolls of film on here, showing both the good and the bad, and giving some basic information as well a little write up of the shoot as well as the reasons why I selected each camera and film.  Enjoy the trip! 

Feature #20:
Camera: ca. 1967 Yashica 12 TLR
Film: Fuji Velvia 100F
Locale: Central Maryland.

When I picked it up late in the Summer of 2014, I saw it as my TLR of the future.  Only problem was that my interest in TLR cameras was soon overshadowed by the magnificent portability and varied formats of 120 folding cameras.  The 12 continued to see decent usage, particular when experimenting with new films when I wanted to be sure of proper focus on the final image, but it never really grew to be the tagalong camera I expected it to be when I first bought it.  Having shot a few rolls through my Seagull TLR recently, it seemed only natural that the 12 should see some use as well, and it did indeed on the advent of Fall in Central Maryland.  Though I had hoped to do more shallow depth of field shots with the camera given its ease of focus accuracy compared to most folding cameras, it really didn't get that chance on this roll, though it was nice to get 12 shots from a roll of film compared to the 8 on the larger format cameras.


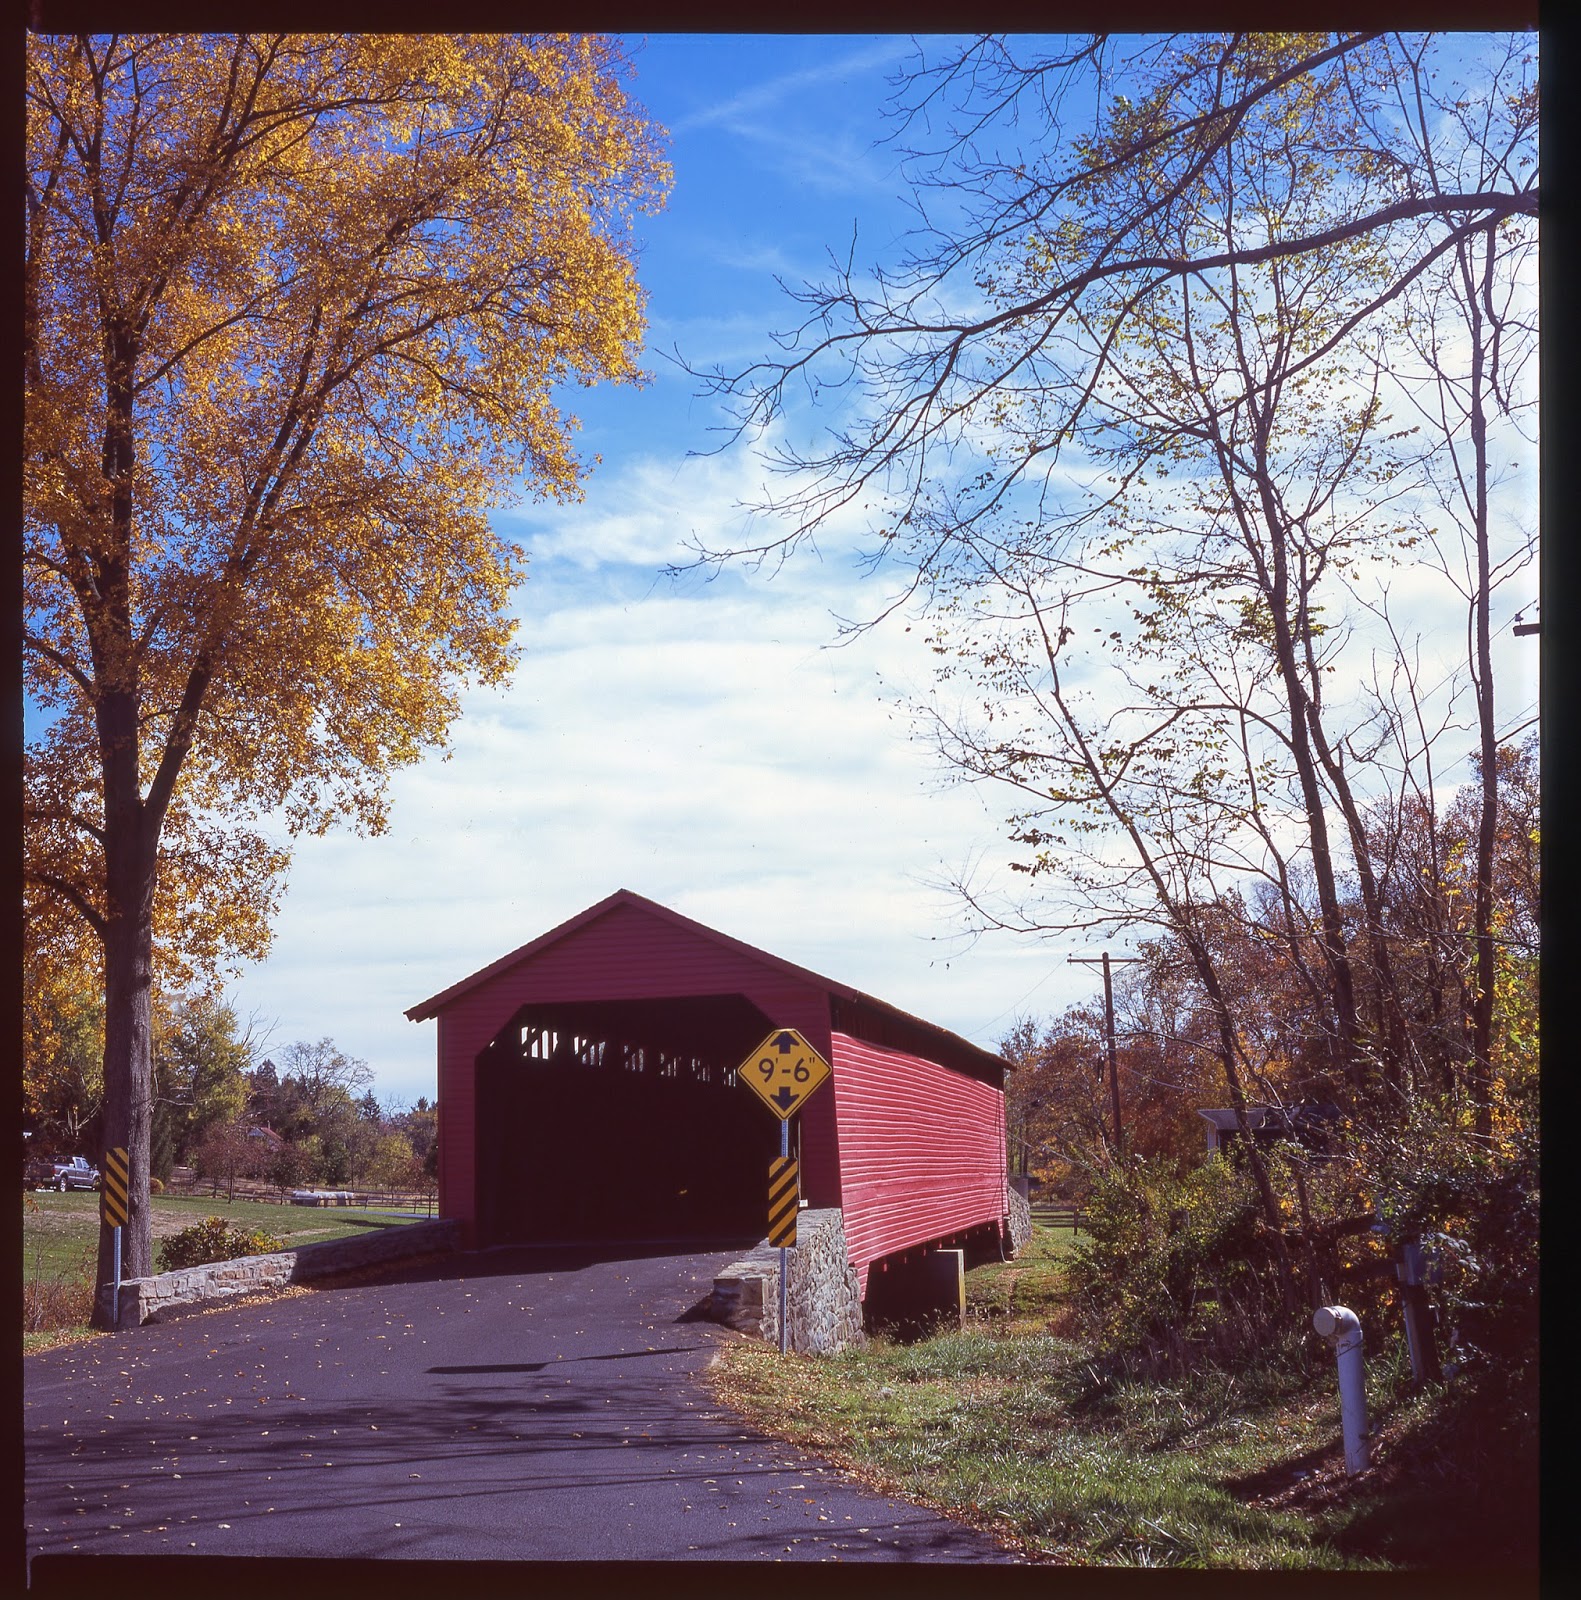
1 - Lewistown, MD - f/11, 1/125 - Continuing the covered bridge ramble in late October, I snapped this shot of the Utica Mills bridge from the opposite side as the other cameras.  The result is one that does brim with image sharpness.


2.09.2016

Innovation Station: Creating 828 film from 120 Film

Not too long ago, I featured a post spotlighting my use of an 828 Bantam camera, for which film hasn't been commercially available for 30 years, with the exception of respooled rolls of Tri-X using 35mm stock that is distributed by Film for Classics for sale at some film retailers.

But let's say you have a Kodak Bantam or other similar 828 format camera and want to use a stock other than Tri-X, or you want to use the format as it was originally intended, in 28x40mm fashion without sprocket holes being evident. Or perhaps you would just like to save money! 

The good news is that any film that is available in 120 format can be used in your 828 camera.  It involves a little bit of effort, but it can be done reasonably cheaply and without a lot for much in the way of specialized tool setups.  Even better, if you follow all the steps shown below, you will actually get the equivalent of TWO rolls of 828 film every time you do this, as the resulting roll of film will readily take 16 exposures, rather than the native 8 of the original format!

Here's what you will need to get started:
  • An unused rigid bodied 120 camera, likely either a TLR or Brownie in style.
  • Your choice of a roll of 120 film, plus spare 120 spool to be a take up spool.
  • Two 828 spools, one to act as the supply spool, the other to take up the film.
  • One 828 camera in which to enjoy shooting your extra long 828 film.
  • One unused flat rigid plastic card, such as a Hotel Room Pass Card, Store Loyalty Card, etc.
  • A couple of junk slides plus some permanent glue.
  • One Utility knife blade that is SHARP!
  • Some Electrical Tape.
  • Scissors
  • A completely dark room or perhaps a changing bag.


1.15.2016

Film Fun Folio #18 - Balda Pontina and Provia 100F

Periodically, I'll be posting scans of some complete rolls of film on here, showing both the good and the bad, and giving some basic information as well a little write up of the shoot as well as the reasons why I selected each camera and film.  Enjoy the trip! 

Feature #18:
Camera: ca. 1951 Unbadged Franka Solida with Schneider 75mm f/2.9 lens.
Film: Fuji Velvia 100F
Locale: Central Maryland.

There have been times when I thought that this camera and my Zeiss Ikonta 521 were the only 6x9 folders that I would ever need, but some light leaks in recent rolls cast some concerns about my beloved Balda Pontina's ability to be completely trusted to deliver a competent image free of defects.  The summer was spent with the Balda sitting with a roll of Provia loaded, but unused.  Finally, with Fall upon me, and some time to explore, the loaded Balda got the call for 8 more images to see what I could muster from it.  I did a nice range of images, including some landscapes in bright light and some time exposures taken in the wee hours of the morning.  


1 - Thurmont, MD - f/5.6, 1/50 - Nice pictoral representation of colors, but a light leak is again evident in this shot.


1.01.2016

Film Fun Folio #17 - Zeiss Ikonta 521 and Provia 100F

Periodically, I'll be posting scans of some complete rolls of film on here, showing both the good and the bad, and giving some basic information as well a little write up of the shoot as well as the reasons why I selected each camera and film.  Enjoy the trip! 

Feature #17:
Camera: ca. 1946 Unbadged Franka Solida with Schneider 75mm f/2.9 lens.
Film: Fuji Provia 100F
Locale: Frederick County, Maryland.

Very few of my 6x9 folders lack some sort of issue.  Some are just less than stellar performers, while others have an issue or two that make completely care free operation an impossibility.  The Zeiss 521 along with the Agfa Billy Record are in fact the only two 6x9s that I have which function just as they should, and of these, the Zeiss is the far more capable of the two.  Given this, you would think that the 521 would constantly have an active roll of film going through it, but in fact, it had been sitting idle and empty since March for little good reason.  


Finally, with Fall in bloom, I rekindled my affection for this reliable and venerable folder by feeding it a roll of Provia, to see what would result in my rambles through Frederick County, Maryland.  Enjoy!                                                       


1 - Lewistown, MD - f/11, 1/100 - I made the error of not really checking out the shutter a few times before loading film into the Ikonta, and when I shot this image, I heard a bit of drag.  I thought I had overexposed it, but it wasn't so bad.  Since I shot the image again, I didn't bother cleaning up the dust after the scan.


11.23.2015

Kickstarter Project: The Galaxy Photographer Planner and Handbook

It was not even a year ago when I found myself in the predicament of having to improvise a way to jot down my exposure information while taking analogue photos.  My solution was the creation of cut-out "exposure notes" that I freely shared from a blog post in late January.

The need to do this stemmed from a lack of any tailored way among a readily available product to handily do this, neither in the print world or even by means of a mobile app. Generally, my improvised solution has worked fairly well, but has a few hiccups to accompany it.  I may not always have a printed "slip" available to tape to the camera back when loading a new roll of film, or I may not have a piece of tape at the ready to stick it to the back of the camera.  Similarly, some of my older cameras have rather delicate coverings, and the tape tends to pull a bit from this covering when it is later removed.  Also, the format I devised did not allow me to venture beyond simply using 120 format or a similar roll film format with limited exposures.

But alas, there may well be hope, with a product listed on the popular crowdfunding site Kickstarter, that will remedy some of the issues I have encountered while using my sticky "notes" that I print myself.  It is called the Galaxy Photographer Planner and Handbook. Comprised of 256 printed pages, it serves as a photo diary and almanac of sorts, and is inspired by a number of photographic diaries dating back to over 100 years.